What to Confirm Before Ordering Custom Enamel Pins
To order enamel pins successfully, define the purpose, final size, shape, enamel style, metal finish, colors, backing, packaging, quantity and delivery requirements before approving the production proof. These choices are connected: a design that looks clear at two inches may become crowded at one inch, and a heavy pin may need two posts instead of one.
This checklist helps brands, clubs, schools, event organizers and merchandise teams prepare a complete inquiry and review the proof without missing important details.
Quick answer: Send vector artwork or a clear concept, specify size and quantity, select soft or hard enamel, choose plating and backing, review the proof at actual scale, and approve production only after checking every word, color and attachment position.
1. Define the Pin’s Purpose
The intended use determines many later decisions. A promotional pin handed out at a conference may prioritize simple artwork and efficient packaging. A collectible club pin may need a premium finish, backstamp and presentation card. A uniform pin must remain secure and comfortable during repeated wear.
- Brand promotion or product launch
- Club, school or team membership
- Employee service or recognition
- Retail merchandise or limited edition
- Fundraising, awareness or community campaign
2. Choose the Right Size and Shape
Pin dimensions should be measured at the widest points. Small pins are subtle and economical, but fine text and narrow color areas may need simplification. Larger pins provide more design space but add weight and may require two posts.
Custom shapes can follow a mascot, shield, product silhouette or event symbol. Avoid weak projections and extremely narrow connecting sections that could bend or break. Review examples on the custom lapel pin page before finalizing the outline.
3. Compare Soft Enamel and Hard Enamel
| Feature | Soft enamel | Hard enamel |
|---|---|---|
| Surface | Recessed color with raised metal lines | Smooth, polished and nearly level |
| Visual character | Textured and dimensional | Refined and jewelry-like |
| Good for | Bold graphics, events and promotional pins | Premium branding, awards and collectibles |
| Design limits | Requires clear metal separation | Requires production-compatible color areas and polishing |
See custom soft enamel pins and custom hard enamel pins for category-specific examples. The best choice depends on the desired surface and artwork, not only price.
4. Select Metal Plating and Surface Effects
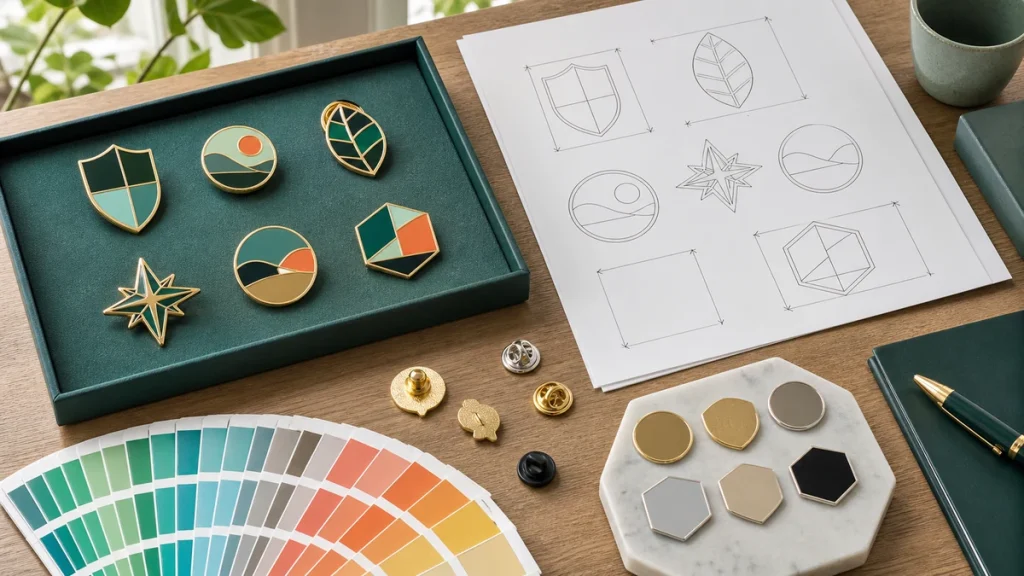
Plating controls the visible metal lines and outer edge. Common options include gold, silver, copper, black nickel and antique finishes. The same enamel colors can look different next to bright gold than next to dark nickel, so the metal choice should be part of the design decision.
Additional effects may include sandblasting, texture, translucent enamel, glitter, glow color, cutouts or printing. Use special effects selectively so the main artwork remains clear.
5. Prepare Production-Friendly Colors and Artwork
Solid enamel colors should be separated by metal lines. Tiny gaps, very thin lines and miniature text may not reproduce cleanly. Provide vector artwork when possible, but a clear image or sketch can still be used as a starting point for production art.
Artwork checklist
- Correct outline and orientation
- Readable text with final spelling
- Clearly separated color zones
- Defined raised, recessed and printed areas
- Front, back and side requirements
- Color references and metal finish
6. Choose the Pin Backing
The backing affects security, comfort and cost. Rubber clutches are comfortable and available in several colors. Metal butterfly clutches are compact and familiar. Locking backs provide greater security for valuable or frequently worn pins. Magnetic backings avoid puncturing fabric but may not suit every garment or environment.
Large, wide or top-heavy pins often benefit from two posts. The proof should show the exact post positions, because poor placement can make a pin rotate while worn.
7. Decide on Backstamp and Packaging
A backstamp can include a small brand mark, year, edition number or manufacturer identification. Keep it simple enough to remain legible. Raised and recessed backstamps create different appearances and should be shown on the proof.
Packaging options include individual bags, printed backing cards, velvet pouches and gift boxes. Retail pins usually need a card with a hanging hole or barcode area, while event giveaways may only require protective individual packaging.
8. Plan Quantity, MOQ and Variations
Minimum order quantity depends on the production process and supplier. Tooling and setup are shared across the run, so unit pricing normally improves as quantity increases. However, ordering excess inventory without a distribution plan can cancel that advantage.
If the design needs several colorways, ask whether they can share the same mold. Keep the metal outline identical and change only enamel colors when possible. This can simplify a collectible series, department set or event variation.
9. Review the Pin Proof at Actual Size
A proof is not only a picture of the idea; it is a production specification. Zoom in to inspect details, then print or view the design at actual size to judge readability. Confirm dimensions, plating, enamel colors, text, post position, backstamp and packaging before approval.
Proof approval checklist
- All wording and dates are correct
- The final dimensions are shown
- Metal lines are thick enough
- Colors match the approved references
- Posts and attachments are correctly positioned
- Front and back details are complete
10. Confirm Production and Delivery Requirements
Provide the required delivery date, destination and packaging plan before production begins. If the pins are needed for a launch or event, allow time for artwork revisions, proof approval, production, inspection and shipping. Complex effects and custom packaging add steps.
Keep one final approved proof and specification sheet for reorders. If you need help matching the process to an existing design, send the artwork through the Difway Awards inquiry page.
Common Enamel Pin Ordering Mistakes
- Choosing a size without checking the artwork at actual scale
- Approving text without a final spelling review
- Using too many tiny color areas
- Selecting one post for a wide or heavy pin
- Leaving packaging until after production
- Providing only a delivery date without shipping destination details
For campaigns that combine pins with other items, compare the full range of custom award products so metal finishes and packaging can remain consistent.
Conclusion
A complete enamel pin order is built from linked decisions: purpose, size, enamel style, plating, color, backing, packaging and quantity. Clear specifications reduce proof revisions and make quality checks easier. Most problems can be prevented by simplifying the design where necessary and reviewing the final proof at actual size before production.
Frequently Asked Questions
What files are needed to order enamel pins?
Vector artwork is ideal, but a clear logo, image or sketch can be converted into production artwork. Include the intended size, colors and any special effects.
Should a large enamel pin use two posts?
Often yes. Two posts help prevent rotation and distribute weight, especially on wide, tall or asymmetrical pins.
Can one pin design have several color variations?
Yes. If the metal outline remains the same, several enamel colorways may share one mold. Confirm the supplier’s variation rules and quantities.
What should be checked on an enamel pin proof?
Check size, outline, text, colors, metal finish, enamel type, post positions, backstamp and packaging. Review both enlarged and actual-size views.