Why Enamel Pin Backing Cards Matter
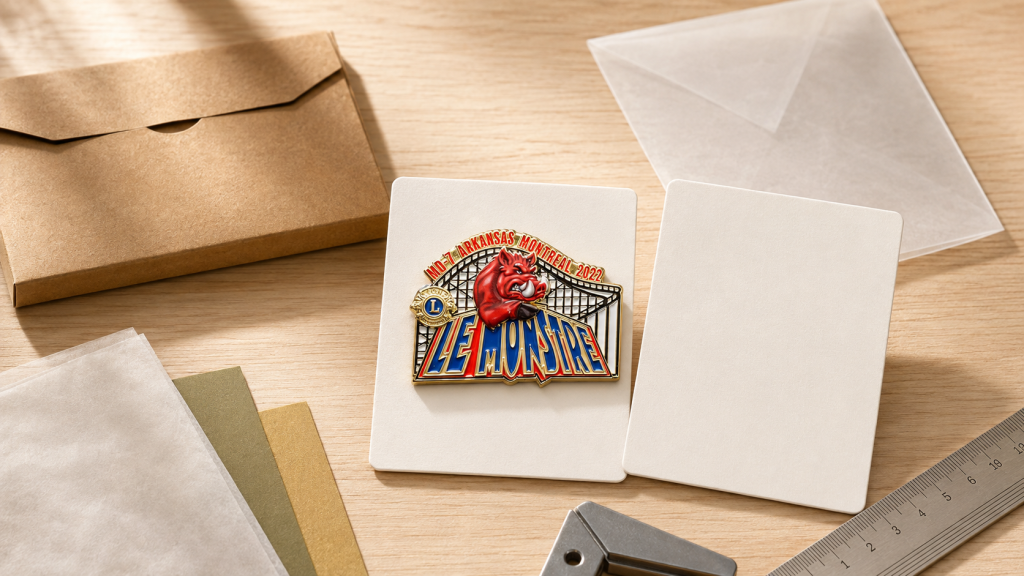
Enamel pin backing cards protect small parts, keep a pin and its clutches together and give the customer a clean way to handle the product. In retail, the card also controls scale: a small pin on a well-proportioned card feels intentional, while an oversized card can make the same product look lost.
Quick answer: start with a 2 x 3 inch card for a single medium pin. Use thicker uncoated or matte-coated stock that stays flat, leave safe space around the pin and confirm post holes from the production proof. Add a glassine sleeve, clear bag or small box according to the sales channel and shipping risk.
Packaging should be planned with the pin, because the final outline, posts and clutch depth determine the card layout. Begin with the intended custom lapel pin design and then size the card around the real product.
Common Backing Card Sizes
| Card size | Good for | Layout notes |
|---|---|---|
| 2 x 2 in | Small single pin | Compact, but leaves little room for product information |
| 2 x 3 in | Most single medium pins | Balanced retail presentation and easy packing |
| 2.5 x 3.5 in | Larger pin or small set | More room for branding and handling space |
| 3 x 4 in | Large pin, two-pin set or premium card | Check that the card does not dominate the product |
| Custom die-cut card | Distinct retail programs | Adds setup cost and requires careful transport testing |
These are starting points, not rules. Print the card outline at full scale and place a sample pin on it. Check margins, visual balance, hang-hole position and whether the clutches extend beyond the card edge.
Choose a Card Material That Stays Flat
Paper weight, fiber direction, coating and humidity all affect stiffness. A thick stock is useful, but stiffness matters more than a number alone. Ask for a physical sample if the cards will hang in a retail display or carry a heavy pin.
- Uncoated stock: natural tactile feel and easy writing, but colors print less glossy.
- Matte-coated stock: crisp printing with low glare and a refined surface.
- Gloss-coated stock: strong color and wipe resistance, but reflections can compete with the pin.
- Recycled kraft: useful for an earthy presentation, although fine colors may shift on the brown base.
- Synthetic card: moisture resistant and durable for outdoor events, with different recycling considerations.
Match the material to the pin finish. Highly polished hard enamel pins often benefit from a restrained matte card, while textured soft enamel pins can pair well with uncoated stock.
Post Holes, Slits and Pin Placement
Use the approved post spacing
Do not estimate holes from the front artwork. The card file should use the exact post positions on the production proof or a measured sample. Two-post pins need consistent center-to-center spacing, and both clutches need enough room behind the card.
Keep the pin visually centered
Center the visual weight, not just the metal bounding box. An asymmetrical pin may look balanced when placed slightly off the mathematical center. Leave more space above the pin if a retail hang hole is required.
Protect the card from tearing
Small round holes work for straight posts. Slits can make assembly easier but may open under weight. Keep holes away from card edges, fold lines and hang holes. A reinforcing label on the back can help with heavy pins, but it should not interfere with clutch removal.
What to Put on the Front and Back
The front should support the product rather than compete with it. A clear brand mark, collection name or short theme is usually enough. Use the back for practical information such as website, contact, materials, care advice, country-of-origin statements or required safety notes.
Keep important text away from posts and clutches. Test every line at printed size. A QR code can be useful when it leads to a stable product or care page, but it should be large enough to scan and should not replace essential information.
Protective Packaging Options
| Package | Best use | Protection | Consideration |
|---|---|---|---|
| Glassine sleeve | Craft retail and lower-plastic presentation | Light scuff protection | Not transparent and limited moisture resistance |
| Clear self-seal bag | General retail and event distribution | Good handling and moisture protection | Choose the smallest practical size |
| Paper envelope | Mail inserts and simple giveaways | Surface and privacy protection | Customer cannot see the pin before opening |
| Small rigid box | Premium, gift and collector editions | Strong impact protection | Higher cost, volume and freight |
| Backing card only | Hand-delivered event pins | Minimal | Edges and pin face remain exposed |
Browse other presentation formats in the custom accessories range. Packaging decisions should reflect the price, sales channel and real handling conditions rather than adding layers automatically.
Backing Cards for Shipping
A retail card is not a shipping carton. During parcel transport, clutches can press into neighboring cards and pin posts can bend. Keep individual pieces separated, immobilize heavy pins and use a rigid outer mailer or box. For sets, make sure metal surfaces cannot rub together.
Run a simple packing test: assemble the final card and sleeve, pack several units as they will ship, shake the carton, place reasonable weight on it and inspect cards, posts and finishes. Repeat the test after any change in card stock or package size.
Planning Backing Cards for a Small Batch
Small batches benefit from flexible card design. Use one card size across a related collection, leave a neutral area for a small label and avoid printing dates unless the inventory is event-specific. The guide to custom enamel pin minimum orders can help align pin quantity with packaging quantity.
- Order a modest reserve for damaged cards and packing setup.
- Keep version numbers outside the visible design area.
- Use a standard hang hole only if the retailer needs it.
- Approve a physical assembled sample before a large print run.
- Store unused cards flat and dry.
Backing Card Preflight Checklist
- Confirm finished card dimensions and corner shape.
- Use exact pin outline, post count and post spacing.
- Check hang-hole clearance and retail fixture compatibility.
- Keep text and QR codes away from hardware.
- Print a full-size paper proof.
- Assemble one real pin and check balance from the front.
- Test the card inside the selected sleeve, envelope or box.
- Review shipping protection and carton quantity.
See more production ideas in the enamel pin manufacturing guide and custom product gallery. Send the artwork, card size, package type and order quantity through the Difway Awards inquiry form for a coordinated pin and packaging quote.
Frequently Asked Questions
What size backing card should I use for one enamel pin?
A 2 x 3 inch card is a useful starting point for one medium pin. Test the actual pin at full scale because unusual shapes and wide designs may need more space.
How thick should an enamel pin backing card be?
It should remain flat while supporting the assembled pin. Paper specifications vary by region, so ask for a stiffness sample rather than choosing only by weight.
Should the backing card have one hole or two?
Match the number and spacing of the pin posts. Two holes are required for a two-post pin and help keep wide designs aligned.
Do backing cards need a plastic bag?
Not always. Hand-delivered event pins may use a card alone, while retail and shipped pins need more protection. Glassine, paper and rigid boxes are alternatives for different needs.
Can one backing card design work for several pins?
Yes, if the card size and adaptable hole layout suit the collection. A shared card lowers complexity, but every assembled design should still be tested for balance and clearance.